EN
 FR
 DE
 IT
 PT
 ES


How to Install Bitdefender Antivirus: Step-by-Step Guide
Nowadays, virus protection is essential for every device you own. Although most devices already have built-in virus protection, you should always install third-party antivirus software to ensure complete protection.

Bitdefender vs. Windows Defender
Bitdefender offers better protection with higher malware detection rates, anti-ransomware protection, anti-phishing and generally better parental controls.
Download Bitdefender Antivirus
The flagship products from Bitdefender that you can buy in our shop are:
• Bitdefender Antivirus Plus
• Bitdefender Internet Security
• Bitdefender Total Security
But which one should you choose?
General Features
Below we explain the differences between the three Bitdefender antivirus programmes and their general functions.
Installation Procedure for macOS Yosemite, El Capitan or Sierra
• Click on “Download centre” in the e-mail you received.
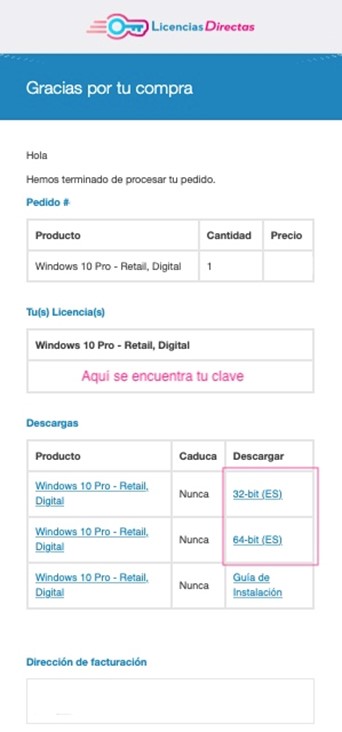
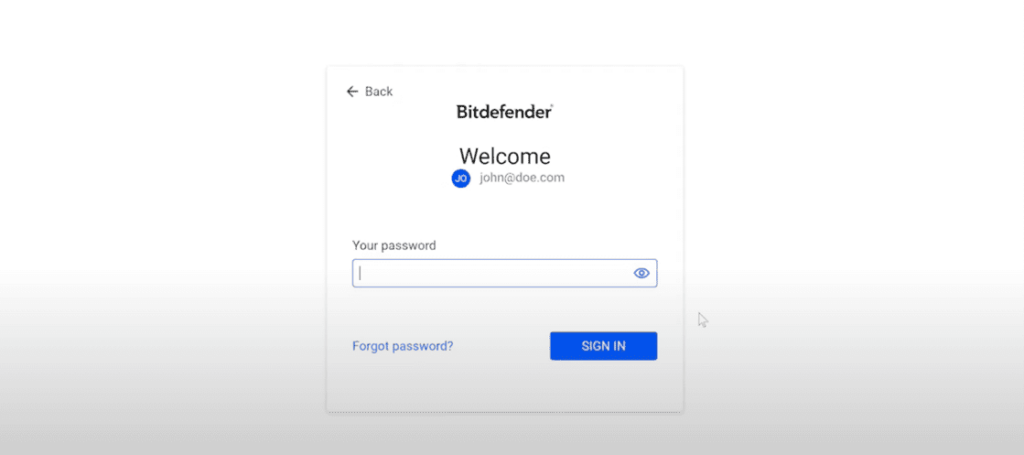
• You will be redirected to the manufacturer’s website where you can register or create a new account.
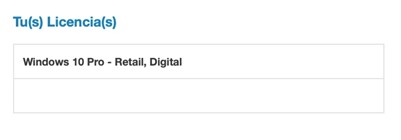
• You will then receive instructions to follow for registration. You will also be asked to enter the licence for the product you have purchased from us.
• Select the software you want to download.
First Step
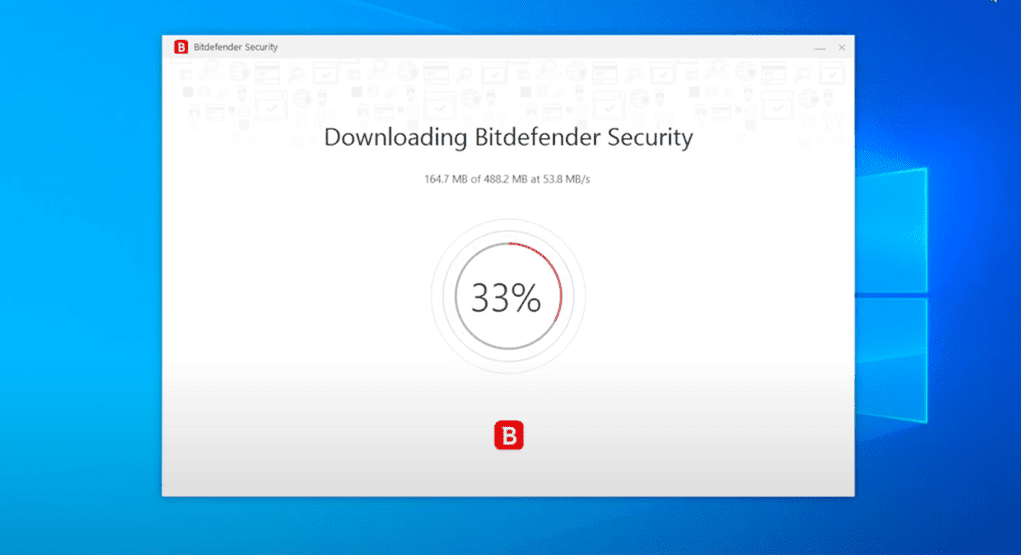
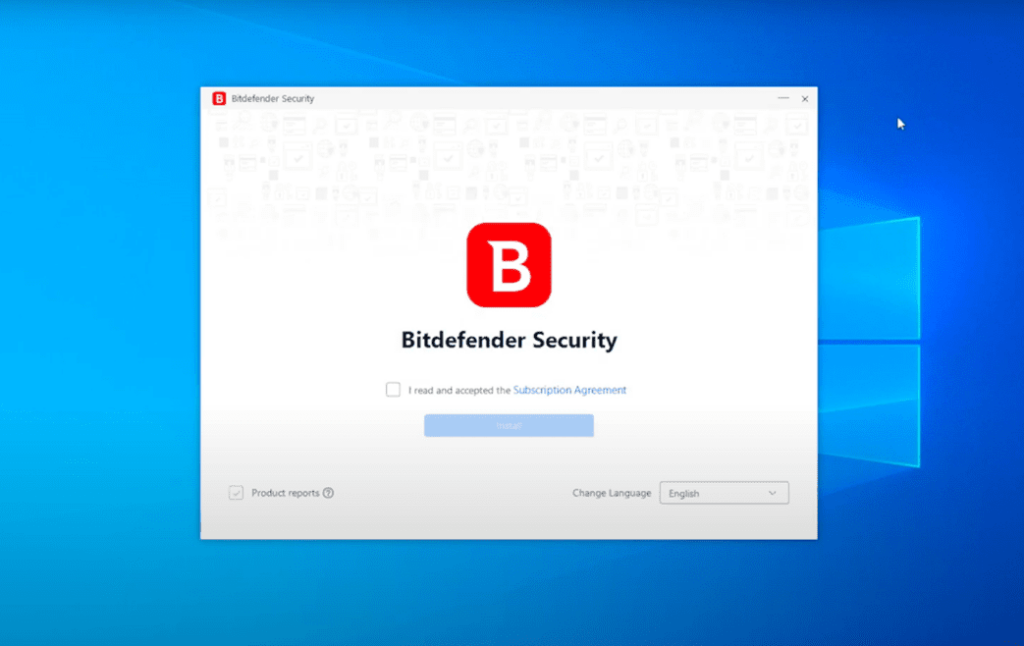
• You must accept the “Subscriber Agreement” which contains the terms and conditions.
• Select the language.
• Click the “Install” button.
Second Step
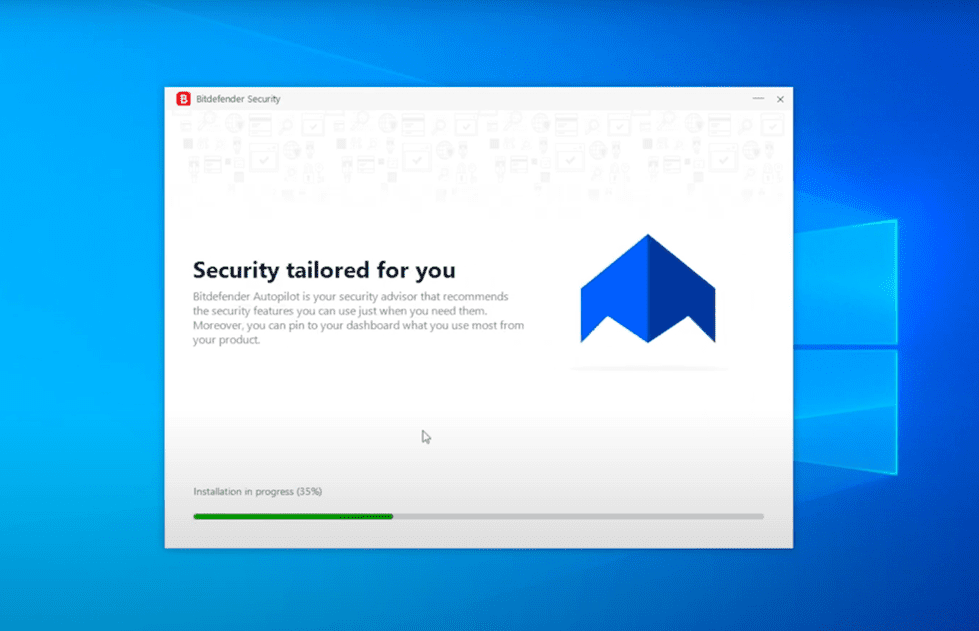
• Wait until the installation is complete.
Third Step
• A summary of the installation is displayed.
• If active threats are detected and removed during the installation, you may be prompted to restart the device.
Fourth Step
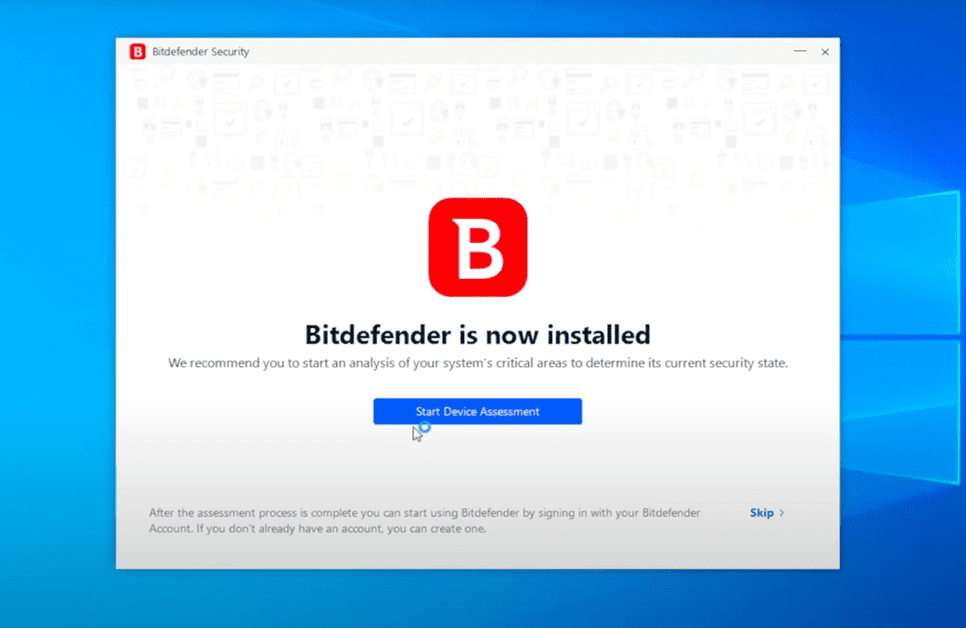
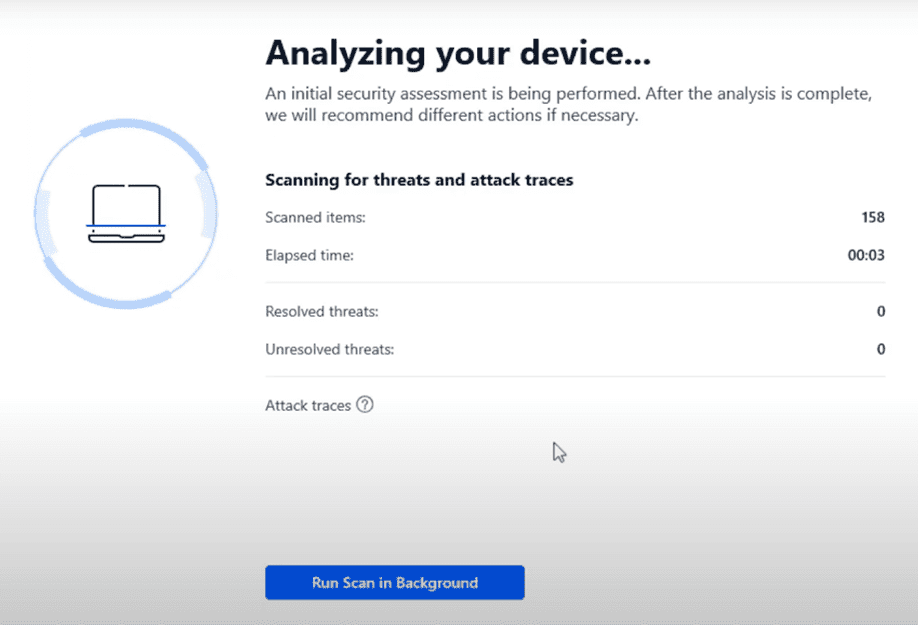
• You will now be asked if you want to run a scan on the device to make sure it is safe.
NOTE: If you do not want to run the scan, simply click “Skip”.
Fifth Step
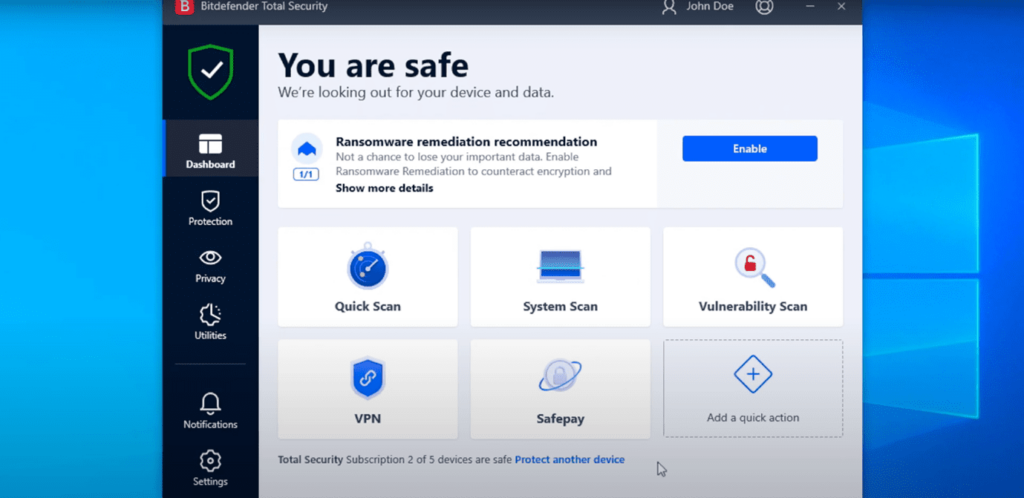
• Click “Finish” to access the Bitdefender Antivirus Plus interface.
• Log in to your Bitdefender Central account. If you do not have an account yet, create one.
• Select the “My Devices” panel.
• In the “My Devices” window, click “+ Install Bitdefender products on your devices”.
• A new window will appear. Select “Security” and then click “This device” to install Bitdefender on your current Mac.
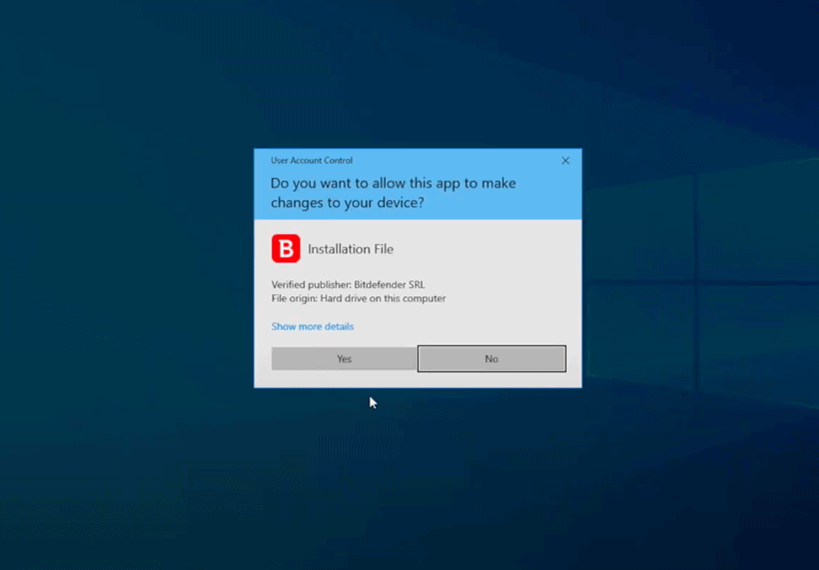
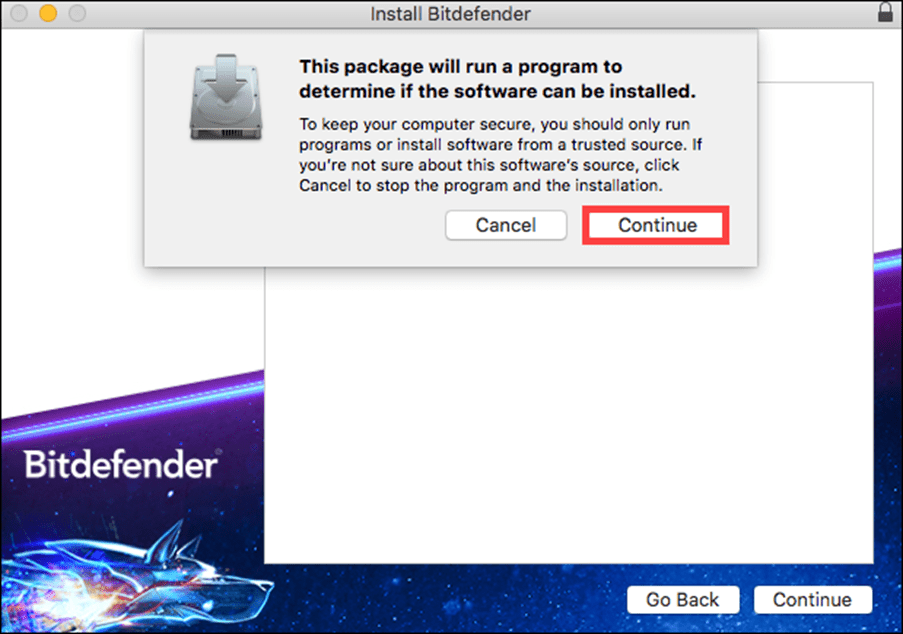
• The installer is downloaded to your Downloads folder. Double-click the Bitdefender file with the .pkg extension and follow the on-screen instructions. Click “Allow” when prompted, then click “Next”.
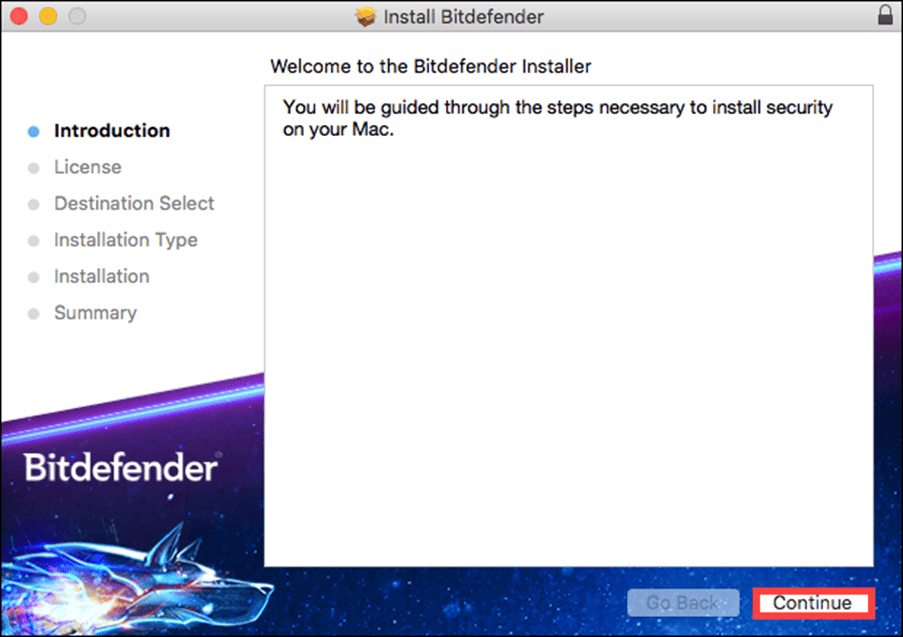
• You will then be guided through the necessary steps to install Bitdefender on your Mac. Click “Next”.
• To proceed with the installation, you must accept the terms of the “Subscription Agreement”.
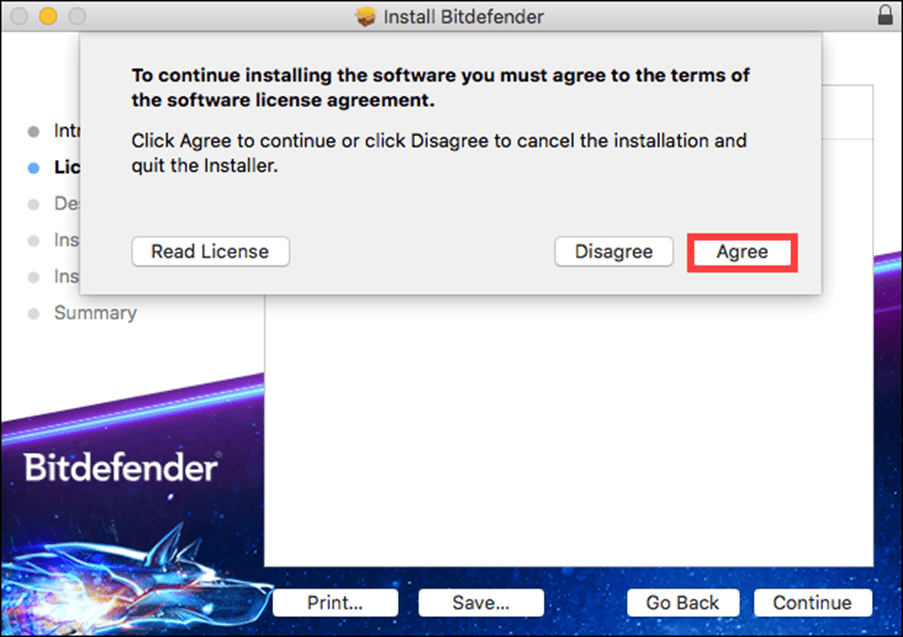
• Select the storage drive on which you want to install the Bitdefender software and click “Next”, then select “Install”.
• When prompted, enter your user name and password and click “Install Software”.
• A small window will appear and Bitdefender Antivirus for Mac will automatically download and install.
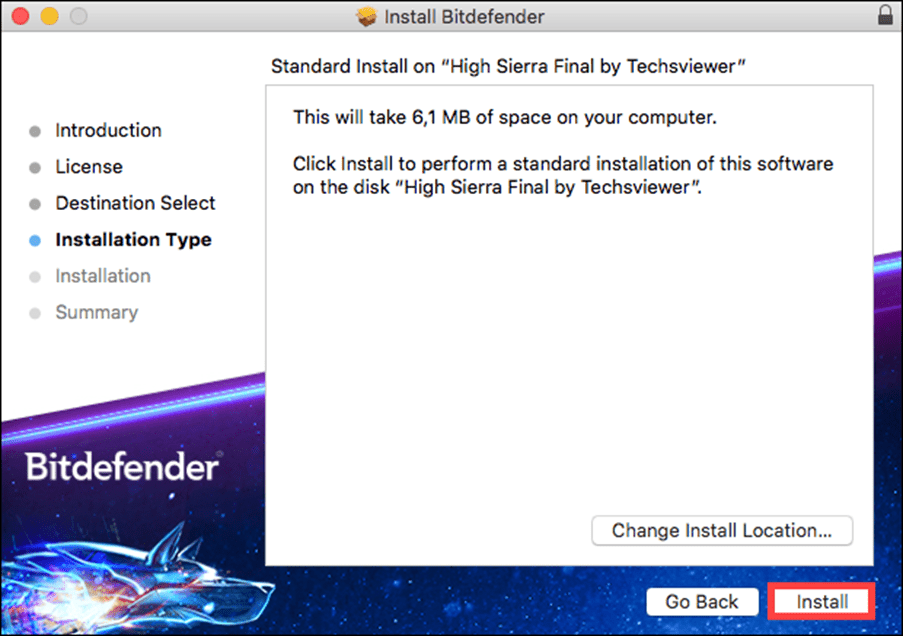
The installation is complete if you have macOS Yosemite, El Capitan or Sierra.
Installation Process for macOS High Sierra, Mojave, Catalina or Big Sur
Follow the steps below only if your Mac is running macOS High Sierra or a newer version such as Mojave, Catalina or Big Sur. Older versions of macOS do not require these additional steps.
To Continue the Installation on High Sierra 10.13
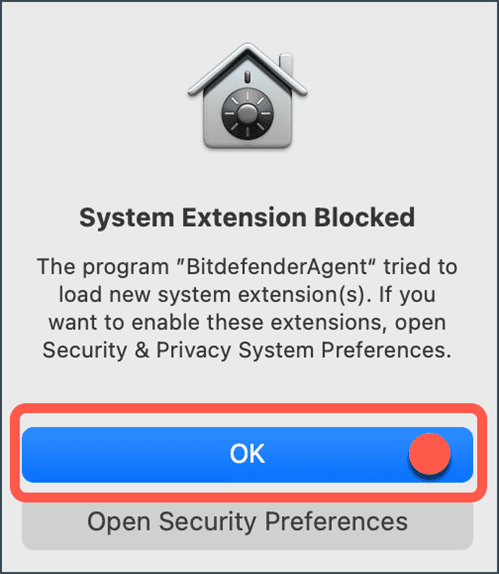
• If you have High Sierra or a newer version of macOS, you will be notified that a system extension signed by Bitdefender has been blocked. This is not an error — it is simply a security check. Click “Accept”.
• The notification appears because of a feature introduced with High Sierra. This feature ensures that only user-approved kernel extensions (KEXT) are loaded onto the system. When a request is made to load an extension that the user has not yet approved, the request is denied and macOS displays a warning.
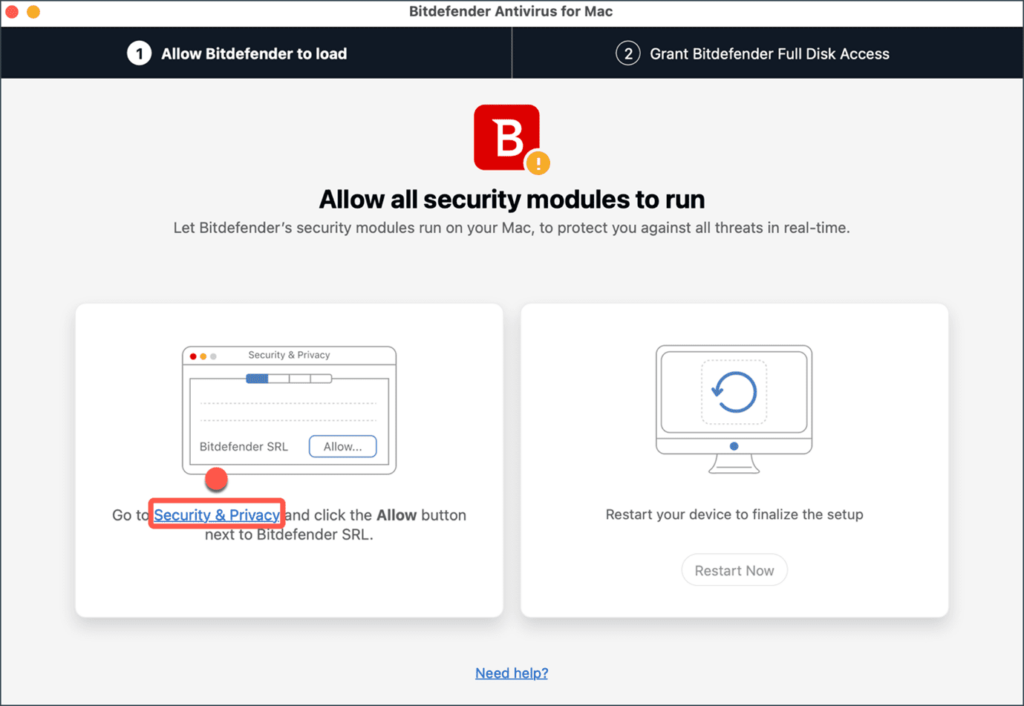
• To help you with the configuration, Bitdefender displays a window listing the steps required to run correctly. Click the “Security and Privacy” link.
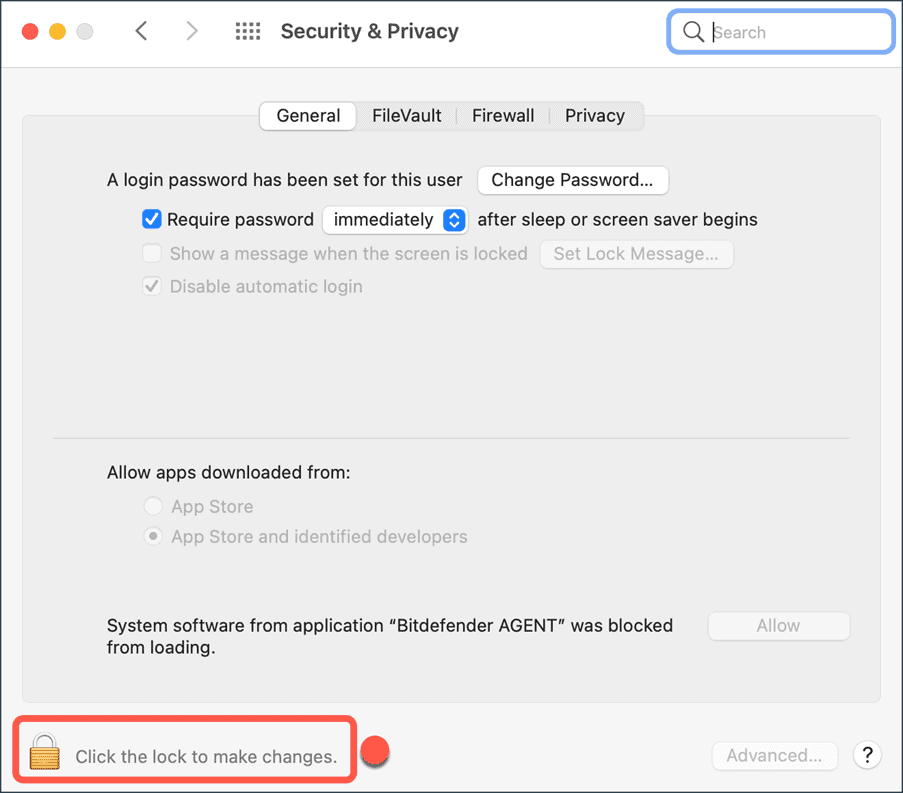
• Click the lock icon in the lower-left corner to make your changes. When prompted, enter your macOS administrator password and click “Unlock”.
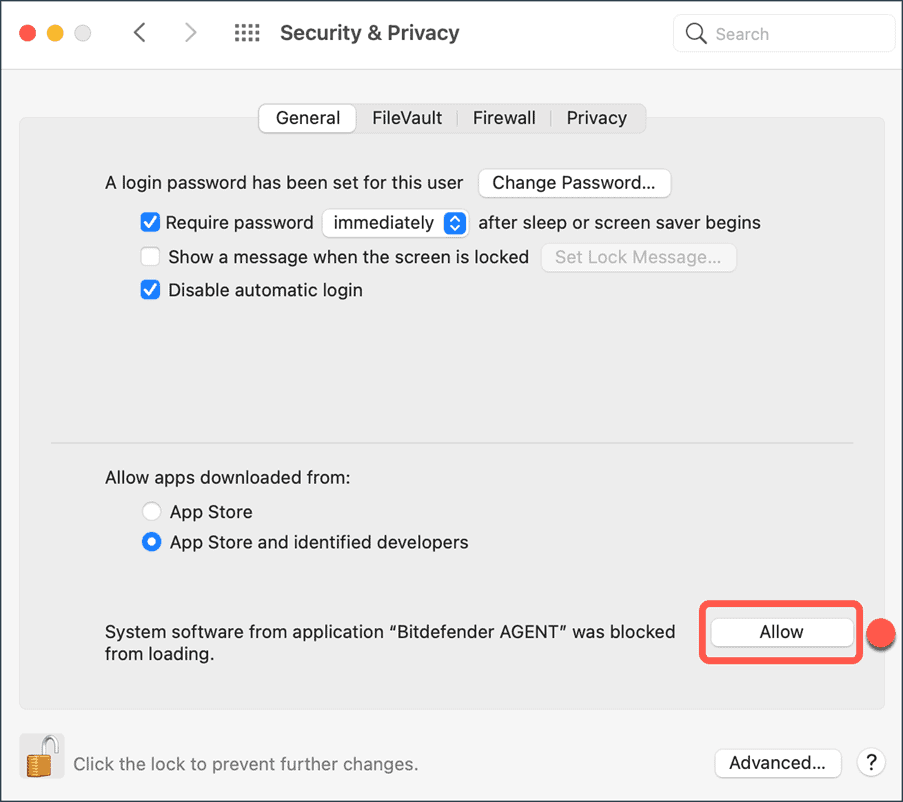
• Click the “Allow” button at the bottom of the window.
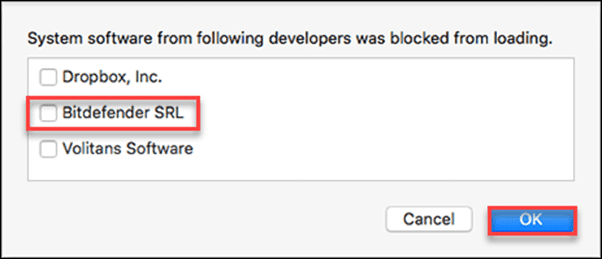
• Select Bitdefender from the list and then click “Accept”.
You have successfully installed Bitdefender Antivirus for Mac on High Sierra.
Installation Procedure on Mojave 10.14 or Higher
• If you have Mojave or a newer version of macOS, you will be notified that a system extension signed by Bitdefender has been blocked. This is not an error — it is simply a security check. Click “Accept”.
• To help you set up Bitdefender, a window is displayed listing the steps required. Click the “Security and Privacy” link.
• Click the lock icon in the lower-left corner to make your changes. When prompted, enter your macOS administrator password and click “Unlock”.
• Click the “Allow” button at the bottom of the window.
• Select Bitdefender from the list and then click “Accept”.
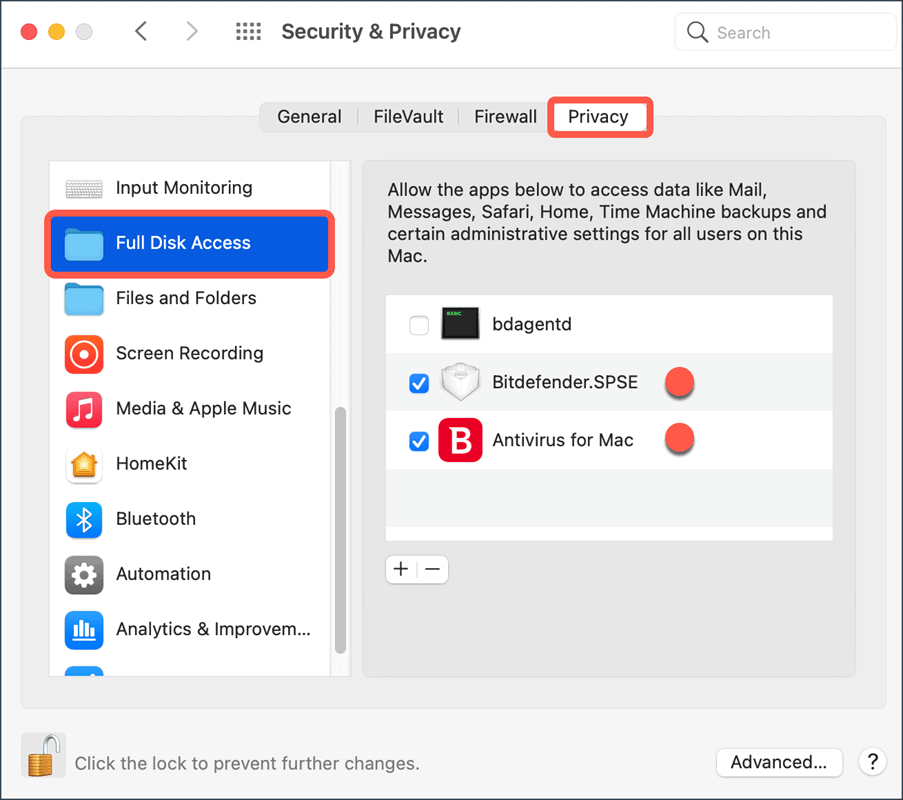
• In the Security and Privacy window, select the Privacy tab.
• Click “Full Disk Access” in the sidebar.
• Tick the boxes for both Bitdefender entries in the list:
• Bitdefender.SPSE
• Antivirus for Mac
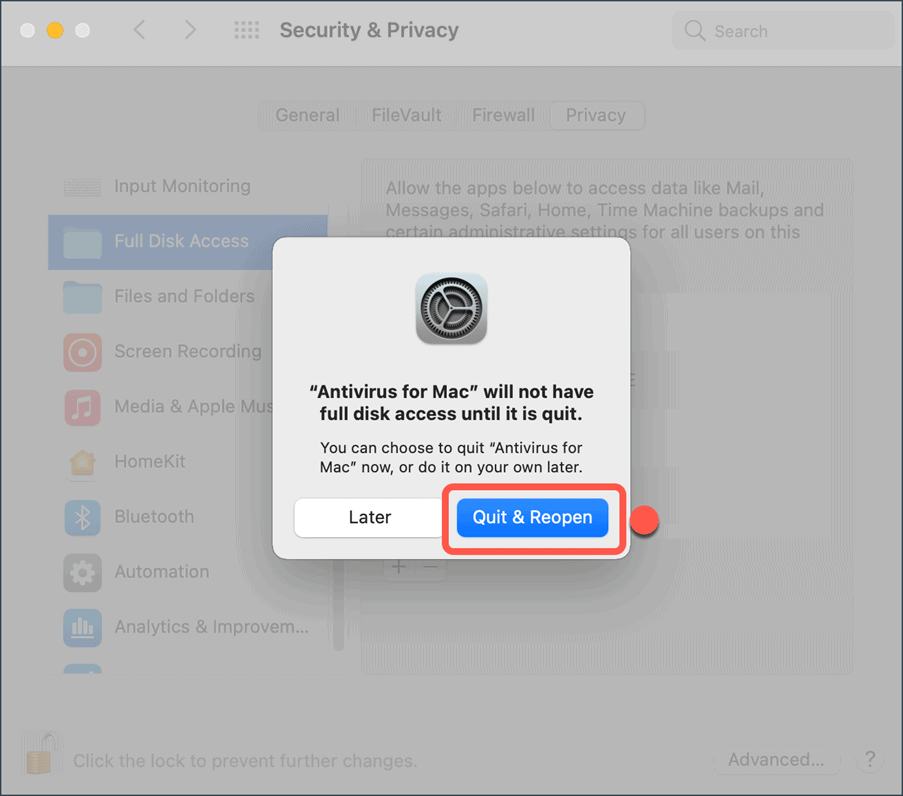
• The following message is displayed: “Antivirus for Mac does not have full access to the hard disk until it is closed.” Press “Exit and reopen”.
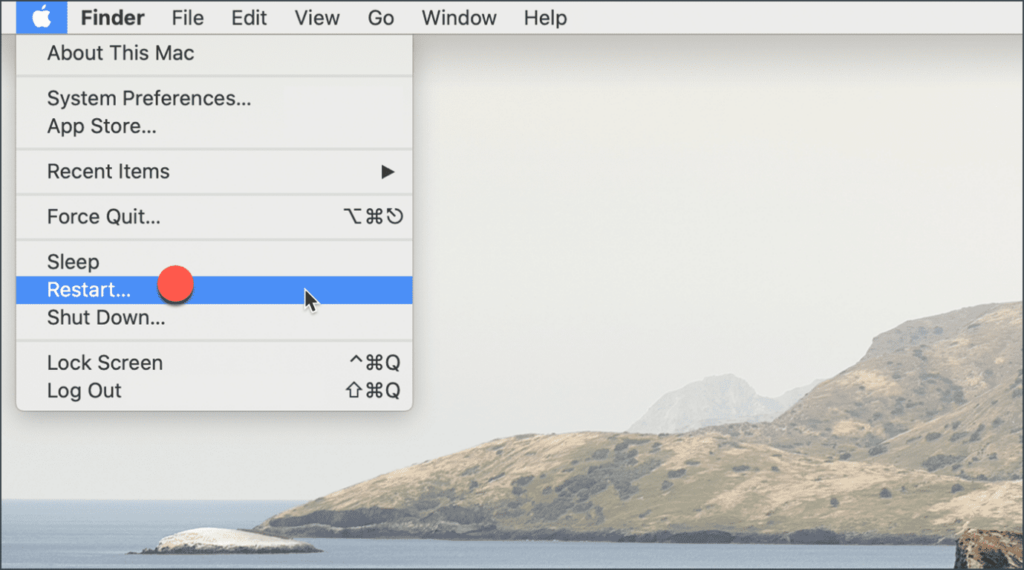
• Restart your Mac to complete the configuration.
You have successfully installed Bitdefender on Mojave, Catalina or Big Sur.
If you are a Licendi customer, you will find both the invoice and the licence transfer in your email.
Looking for a different antivirus solution? You may also find our guides on how to install Avast Antivirus and how to install AVG Antivirus helpful.
Any Problems?
We Have an Activation Guarantee
If the licence does not work, we will replace it immediately and free of charge. Our licences must be activated within a certain time frame. If you have followed all the instructions and downloaded, extracted (if necessary) and installed the file, but the licence does not activate the software, it is possible that the licence has expired.
In this case, please fill out the form in our help centre and send us a screenshot or image showing the error message. You will then receive a new licence key for immediate activation.
The licence gives you the right to download and use updates.
Ready to protect your devices? Browse our Bitdefender licences and get started today.
Best regards,
The Licendi Team