How to install Windows Server?
Welcome to the Windows Server installation tutorial. In this tutorial, we will guide you step by step through the process of installing Windows Server on your PC.
Windows Server is a powerful and versatile operating system designed specifically for server environments. Whether you are setting up a server for your business, a home network or a personal project, this tutorial will provide you with the detailed instructions you need to perform a successful installation. Throughout this tutorial, you will learn how to create a boot drive, select the appropriate installation options and activate your copy of Windows Server. Let's get started with the exciting journey of installing Windows Server on your PC!
Pre-installation
First, you have to choose between creating a bootable USB stick or creating a bootable DVD. The steps for each of these options are explained below.
Creating a bootable USB flash drive
Click on the "Download Program" link and start downloading the file.
Install a program such as Rufus to create bootable media.
Start Rufus.
Choose the USB stick you want to write to and make sure you have at least 8 GB of space available. In addition, you need to choose the version of Windows downloaded in step 1 and click "Next".
Creating a bootable DVD
Click on the "Download Program" link and start downloading the file.
Go to the "Downloads" folder on your PC and select the ISO file you just downloaded.
Insert an empty DVD into your DVD burner and right click on the ISO file.
Select the "Burn disc image" option.
Installation
Connect the USB stick to your computer or insert the DVD into the appropriate drive.
Make sure that the computer boots from the installation media. You may need to adjust the boot order in the BIOS settings. Consult your motherboard manual for more specific instructions on how to change the boot options.
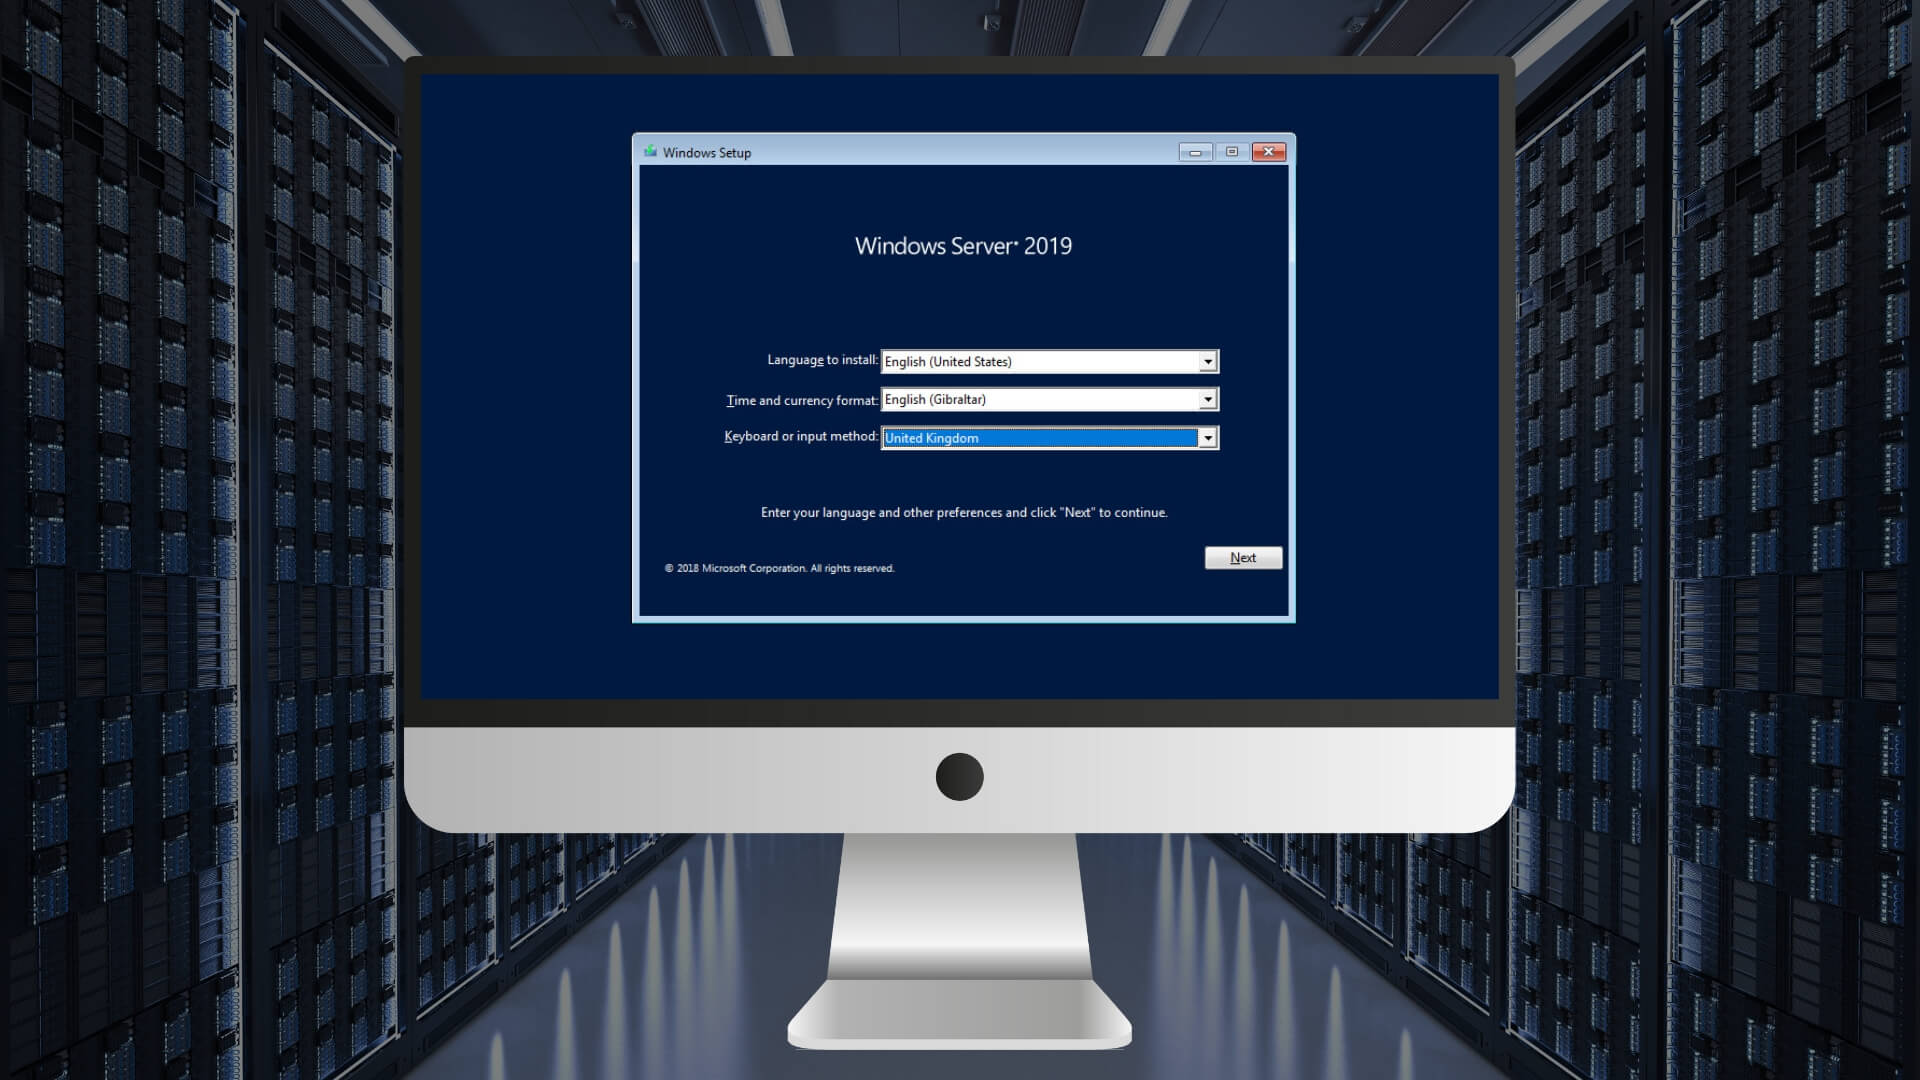
Boot the computer from the DVD or USB stick and follow the prompts in the installation program.
Activation
Once the Windows Server installation is finished, you have to verify the edition that has been installed. If the "Evaluation" edition appears you have to follow the instructions in the upgrade guide provided afterwards. If the full edition has been installed as "Windows Server Standard" or "Windows Server DataCenter" follow the key activation instructions.
Upgrade Guide
To activate the Windows Server version, it is necessary to previously update it to the desired edition. Therefore, the generic key shown below must be used to obtain the desired version. Start the command line / CMD with administrator privileges and copy the following line:
dism /online /get-targeteditions
Then enter one of the following lines with the generic key corresponding to the server version you want:
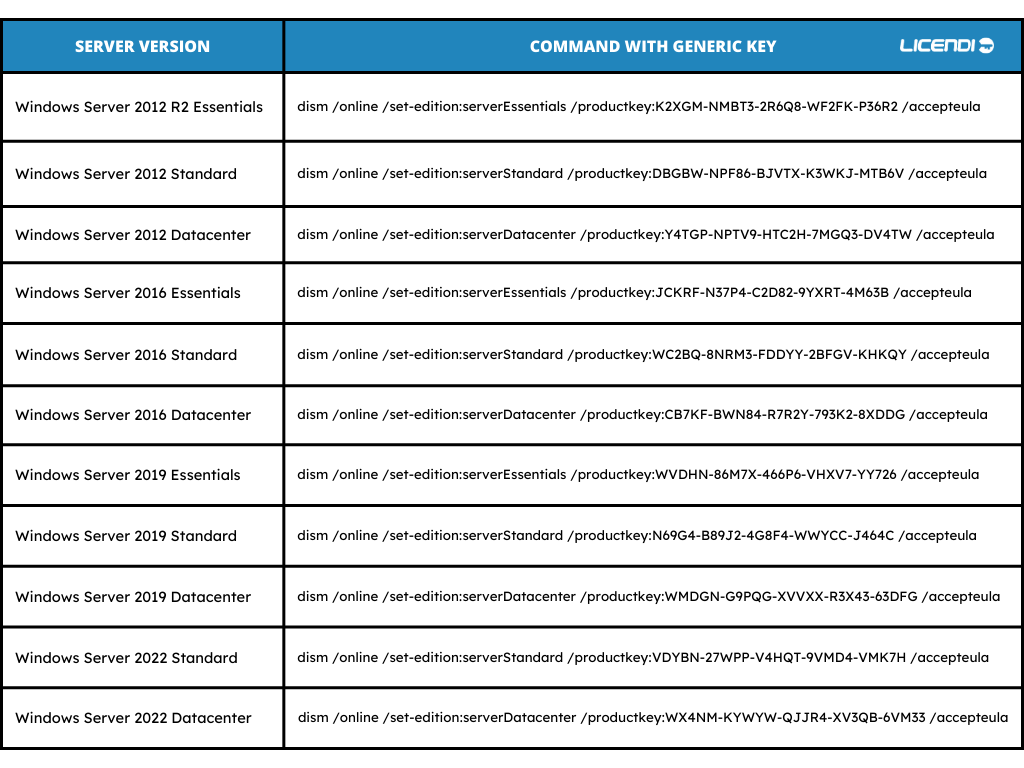
These generic keys may run out over time, so if they don't work for you, we recommend that you look for any generic key on the web.
During the upgrade process, the system may reboot several times. Once the upgrade is complete, you will be able to enter the activation key you purchased by following the instructions in the key activation guide.
Key activation guide
Now you have to enter the following line (replacing the letters with the key you have purchased) into the system after opening the command prompt with administrator rights:
slmgr /ipk AAAA-AAAAA-AAAA-AAAAA-AAAAA-AAAAA.
In addition, you can force activation with the command:
slmgr /ato
Windows Server Virtual Activation
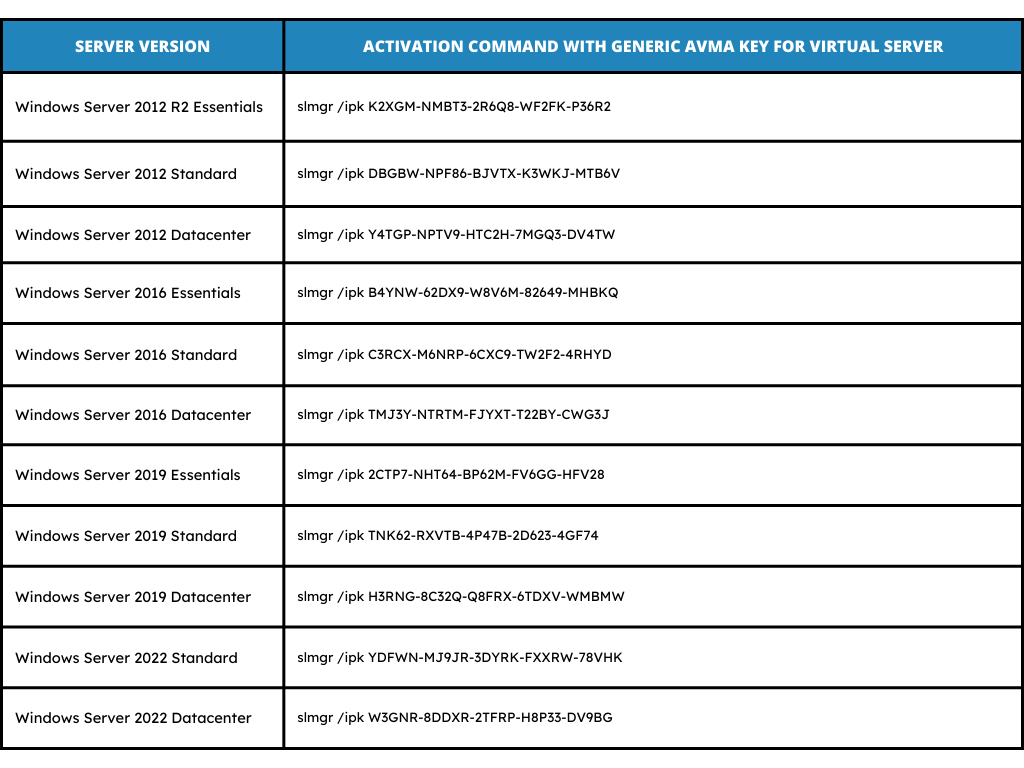
In order to enable a Windows Virtual Server on a physical Windows Server that is properly licensed, we ask that you use the following AVMA keys provided by Microsoft:
In this case, you can also force the activation with the command:
slmgr /ato
These generic keys may run out over time, so if they don't work for you, we recommend that you look for any generic key on the web.
End of activation
This is the end of our guide on how to install Windows Server, we are sure that after following all these steps correctly you will successfully activate your license!
If you have any further questions regarding Windows Server license activation, feel free to contact us!
Your Licendi Team