How to Fix Error 0x80070070
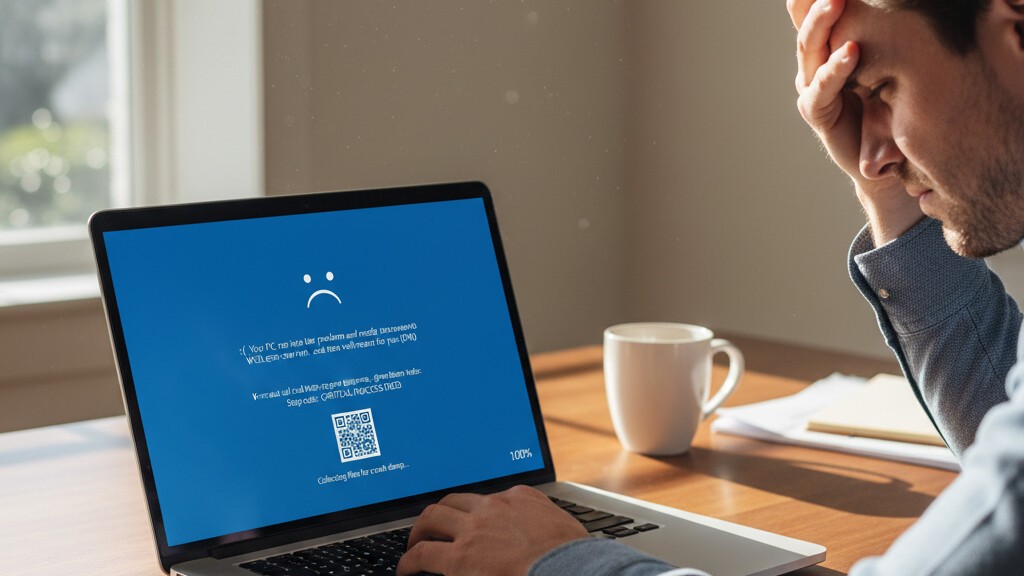
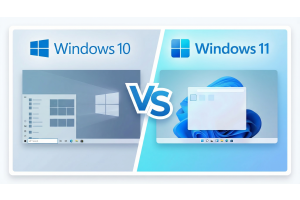
Installing Windows 11 should be easy. But sometimes, error codes stop the installation.
Error 0x80070070 is a common and frustrating problem. It often shows up with slight changes, like 0x80070070 - 0x50011, 0x80070070 - 0x50012, or 0x80070070 - 0x60000.
If you see this error, don't worry. This guide will explain what it means and give you many ways to fix it. You'll get Windows 11 installed successfully.
What is Error 0x80070070 and Why Does It Occur
Error 0x80070070 means your computer doesn't have enough space to install or upgrade Windows. When this error appears, Windows can't continue. It needs more room on your hard drive or SSD to put all the necessary files.
Understanding the Error Variants
This error can show up in a few ways. Each one gives a small hint about what went wrong:
- Error 0x80070070 - 0x50011: This usually happens at the start of installation. Windows is copying files but needs more space than you have.
- Error 0x80070070 - 0x50012: This often appears in the middle of installation. Windows ran out of space while adding updates or other parts.
- Error 0x80070070 - 0x60000: This often shows up when you upgrade from an older Windows. The upgrade needs extra space for the new Windows files and a backup of your old system.
Windows 11 Disk Space Requirements
Before we look at fixes, let's see how much space Windows 11 really needs. Microsoft says the least amount of space required is:
- 64 GB or larger storage device: This is the absolute minimum for installation
- Additional space for updates: Windows regularly downloads updates that can consume several gigabytes
- Space for temporary files: The installation process creates temporary files that are deleted after completion
- Recovery partition space: Windows creates a recovery partition for system restoration
We suggest having at least 80-100 GB of free space before you try to install Windows 11. This gives you plenty of room for the installation and helps avoid space problems right after.
Diagnosing the Problem: How to Check Your Disk Space
Before you try any fixes, check how much disk space you have. This helps you understand the problem and pick the best solution.
Method 1:
Using File Explorer
- Press Windows key + E to open File Explorer
- Click on This PC in the left sidebar
- Look at your system drive (usually C:) and note the available space shown below the drive icon
- The bar will be colored red if you are critically low on space
Method 2:
Using Storage Settings
- Press Windows key + I to open Settings
- Navigate to System and then Storage
- Here you will see a detailed breakdown of space usage including apps, temporary files, and other categories
- This view helps identify which categories are consuming the most space
Solution 1: Use Windows Disk Cleanup Tool
Disk Cleanup is a tool built into Windows. It helps remove files you don't need. It's the safest and easiest way to free up space.
How to Free Up Disk Space
Running Basic Disk Cleanup
- Press the Windows key and type Disk Cleanup
- Select the Disk Cleanup application from the results
- Choose your system drive (usually C:) when prompted
- Wait for Windows to calculate how much space can be freed
- Check the boxes next to the file types you want to delete:
- Downloaded Program Files
- Temporary Internet Files
- Recycle Bin
- Temporary files
- Thumbnails
- Click OK and then Delete Files to confirm
Running Extended Disk Cleanup (System Files)
For more aggressive cleanup, including old Windows installation files:
- In the Disk Cleanup window, click Clean up system files
- Select your system drive again and wait for the calculation
- Additional options now appear, including:
- Windows Update Cleanup (can free several gigabytes)
- Previous Windows installation(s)
- Windows upgrade log files
- Device driver packages
- Select the additional categories and click OK to delete
The Windows Update Cleanup option can often free up 5-10 GB or more. This is especially true for computers that have had many updates.
Solution 2: Enable and Configure Storage Sense
Storage Sense is a Windows feature. It automatically frees up space by deleting files you don't need, like temporary files and items in your Recycle Bin.
Enabling Storage Sense
- Open Settings (Windows key + I)
- Go to System and then Storage
- Turn on the Storage Sense toggle
- Click on Storage Sense to configure its settings
Configuring Storage Sense for Maximum Effectiveness
- Set 'Run Storage Sense' to 'During low free disk space'
- Under 'Temporary Files,' turn on 'Delete files in my recycle bin if they have been there for over' and set it to 1 day or 14 days
- Turn on 'Delete files in my Downloads folder if they have not been opened for more than' and pick a good time frame
- Click Run Storage Sense now to immediately free up space
Storage Sense is very helpful for stopping future disk space problems. It runs on its own to keep enough free space.
Solution 3: Clear Temporary Files Manually
Sometimes, the built-in cleanup tools don't remove all temporary files. You can delete these files yourself to get more space back.
Clearing the Temp Folder
- Press Windows key + R to open the Run dialog
- Type %temp% and press Enter
- This opens your user temp folder
- Press Ctrl + A to select all files
- Press Delete to remove them
- Some files may be in use and cannot be deleted; simply skip these
Clearing the Windows Temp Folder
- Press Windows key + R
- Type temp (without the percentage signs) and press Enter
- Delete all files in this folder as well
- Again, skip any files that are in use
Clearing the Prefetch Folder
- Press Windows key + R
- Type prefetch and press Enter
- Click Continue if prompted for administrator permission
- Delete all files in this folder
Note: Deleting prefetch files is safe and frees up space. However, it might make applications open a little slower the first time as Windows rebuilds these files.
Solution 4: Uninstall Unnecessary Applications
Big apps, games, and programs you don't use anymore can take up a lot of space. Removing them is one of the best ways to free up room.
Identifying Space-Consuming Applications
- Open Settings (Windows key + I)
- Go to Apps and then Installed apps
- Click Sort by and select Size (Large to small)
- Review the list to identify large applications you no longer need
Uninstalling Applications
- Click the three dots next to the application you want to remove
- Select Uninstall
- Follow the prompts to complete the uninstallation
- Repeat for other unnecessary applications
Pay special attention to:
- Games you no longer play (these often consume 50 GB or more)
- Old software versions (if you have upgraded to a newer version)
- Trial software you never used
- Pre-installed bloatware that came with your computer
Solution 5: Move Files to External Storage
If your personal files are taking up a lot of space, move them to an external drive. This can quickly free up room on your main drive.
Files to Consider Moving
- Videos and movies (these are often the largest files)
- Photo libraries
- Music collections
- Downloaded files
- Old documents and projects you do not actively use
Using an External Hard Drive
- Connect an external hard drive or USB flash drive to your computer
- Open File Explorer and navigate to your large files
- Select the files you want to move
- Right-click and select Cut
- Navigate to your external drive
- Right-click and select Paste
Using Cloud Storage
Cloud services like OneDrive (which comes with Windows), Google Drive, or Dropbox can help free up space on your computer:
- Upload files you don't need right away
- Once uploaded, delete the copies on your computer
- You can download files again whenever you need them
Solution 6: Extend Your System Partition
If your drive has many sections (partitions), you might be able to make your main system section bigger. You can use space from another section.
Using Disk Management
- Press Windows key + X and select Disk Management
- Review your disk layout to see if there is unallocated space or a partition you can shrink
- To shrink a partition, right-click on it and select Shrink Volume
- Enter the amount of space to shrink
- Right-click on your system partition (C:) and select Extend Volume
- Follow the wizard to extend the partition
Important: The empty space must be right next to your system section and to its right. If it's not, you might need special software to manage your drive sections.
Solution 7: Use an External Drive for Windows Installation
If you can't free up enough space on your computer's main drive, Windows lets you use an external drive during installation.
How to Use External Storage for Installation
- Connect an external hard drive or USB drive with at least 16 GB of free space
- Start the Windows 11 installation
- When the error appears, do not close the installer
- The installer should detect the external drive and offer to use it for temporary files
- Select the external drive and continue the installation
After Windows installs, you can unplug the external drive. Then, delete the temporary installation files.
Solution 8: Clean Install Instead of Upgrade
If you're upgrading from an older Windows and still have space problems, a clean installation might be easier.
Benefits of Clean Installation
- Removes all old files and starts fresh
- Eliminates accumulated system bloat
- Often results in better system performance
- Requires less disk space than an upgrade
Preparing for a Clean Installation
Before performing a clean installation, ensure you:
- Back up all important files to external storage or cloud
- Write down your installed apps so you can install them again
- Save your browser bookmarks and passwords
- Have your Windows 11 product key ready to activate it
A clean installation completely wipes your main drive. So, it's very important to prepare well.
Preventing Error 0x80070070 in the Future
Once Windows 11 is installed, you'll want to stop this error from happening again during future updates.
Regular Maintenance Practices
- Weekly cleanup: Run Disk Cleanup once a week. This removes temporary files before too many build up.
- Check disk space: Keep an eye on how much free space you have. Windows works best when at least 15-20% of your main drive is free.
- Manage downloads: Often check and delete files in your Downloads folder.
- Uninstall unused software: Every now and then, check your installed apps and remove those you don't use.
Configure Automatic Maintenance
- Enable Storage Sense: As described earlier, this feature automatically manages disk space.
- Schedule disk cleanup: You can set up a task to run Disk Cleanup on its own.
- Update wisely: Install Windows updates quickly. This stops them from building up and taking extra space.
When to Consider Hardware Upgrades
If you often run out of disk space, it might be time to get more storage.
Signs You Need More Storage
- Always moving files to keep space free
- Can't install apps or games you want
- Computer slows down because of low disk space
- Often getting warnings about low disk space
Upgrade Options
- Larger SSD: New SSDs are cheap and much faster than old hard drives. A 500 GB or 1 TB SSD gives most users plenty of space.
- Add another drive: If your computer has room, add a second drive for storage. Keep the SSD for Windows. This is a great solution.
- External storage: For files you don't use often, an external hard drive gives you cheap extra space.
Get Your Genuine Windows 11 License
If you're installing Windows 11 for the first time, or need to activate it again after a clean install, you'll need a valid product key.
At Licendi, we sell real Windows 11 Professional licenses at good prices.
Why Choose Licendi for Your Windows License?
- 100% real licenses: All our licenses are original and fully legal
- Instant digital delivery: Get your product key right away by email
- Big savings: Up to 70% off compared to store prices
- Customer support: Our team is here to help with any questions
- Many payment options: Easy and safe ways to pay
Don't let activation problems add to your installation worries. Get your real Windows 11 license from Licendi. Enjoy all features, updates, and security fixes.
Conclusion
Error 0x80070070 might look scary at first. But it's actually one of the easier Windows installation errors to fix. The main problem is just not enough disk space. The fixes range from simple cleanup to using an external drive during installation.
To summarize your options:
- Disk Cleanup: The fastest and safest first step
- Storage Sense: For automatic ongoing maintenance
- Manual temp file deletion: For additional space recovery
- Uninstall applications: Particularly effective for large games and programs
- Move files: Transfer personal files to external or cloud storage
- Extend partition: If you have available space on other partitions
- External installation storage: Use an external drive during installation
- Clean install: Start fresh if upgrade issues persist
By following these steps, you should fix error 0x80070070 and install Windows 11. Remember to keep your disk space clean to stop similar problems later.
Frequently Asked Questions
How much free space do I really need for Windows 11?
Microsoft says 64 GB is the least you need. But we suggest having at least 80-100 GB free. This gives you enough room for the installation, first updates, and for your system to run well.
Will I lose my files if I use Disk Cleanup?
Disk Cleanup only removes system files, temporary files, and cached data that are safe to delete. Your personal documents, photos, videos, and apps will not be touched. But emptying the Recycle Bin will delete those files forever.
Can I install Windows 11 on an external drive?
You can't install Windows 11 on an external drive for normal use. But you can use an external drive to get more space during the installation. The actual Windows install will still go to your computer's main drive.
What if I still get the error after trying all solutions?
If you've tried everything and still see the error, think about these steps: check your drive for errors using CHKDSK, make sure your drive isn't failing, or do a clean installation with a newly formatted drive.
Is error 0x80070070 only for Windows 11?
No, this error can happen with any Windows version, including Windows 10. The fixes in this guide work for all recent Windows versions.
How long does it take to free up enough space?
It depends on how you do it. You can free up a lot of space in 5 minutes (with Disk Cleanup). Or it might take several hours if you move many large files to an external drive.
Ready to install Windows 11? Visit our store and get your Windows 11 Pro license. You'll get the best price and instant digital delivery.
Licendi - Original licenses with up to 70% discount.